PHOTOGRAPHY
Developing Film
Last week I developed my first roll of film at home. My mom had given me a roll of Kodak Gold 200 (expired many years ago I’m sure), and I had taken some pictures I didn’t care all that much about on it. Kodak Gold, and all the other film I have shot thus far, is a color negative film, and color negative films are developed most commonly using a development process introduced by Kodak in 1972 called C-41. I had done a fair amount of research on the viability of home C-41 development, and, while most people tend to start with black and white development, most of the information I found seemed to suggest it was easy enough.
The most popular option for home C-41 development was a powder kit made by either Unicolor or Tetenal. I picked up the 1 Liter Unicolor one from freestylephoto because it was the cheapest I could find. C-41 development consists of four main steps, though in most home kits the second and third and combined in one. The Unicolor kit comes with four powder packets (Developer, Blix A, Blix B, and Stabilizer) which mix up to one liter each of developer, blix, and stabilizer. I used some amber bottles (somewhat lightproof bottles help with shelf life of chemicals) from amazon to mix and store the chemicals. C-41 process chemicals aren’t super dangerous as far as chemicals go, but there are some precautions that you should take while handling them.
Film, being photosensitive, requires a dark environment while developing. Any amount of light can fog and ruin the negatives. Typically, for large scale development and printing operations, film is developed in a darkroom. I don’t have a darkroom, and so had to make do with a Patterson tank. This tank solves the darkness problem by keeping the film in a light sensitive chamber that you can pour chemicals in and out of without exposing the film to light. As long as you load the film on the reels in darkness, you can do the developing in daylight. I loaded my film onto the reels at night in my closet under a blanket for extra safety. The actual process of developing the film was involved but fairly simple. You pour the chemicals into the tank, agitate every thirty seconds or so, and switch chemicals after a certain period of time. After all of the steps of developing I hung the film to dry in my shower.
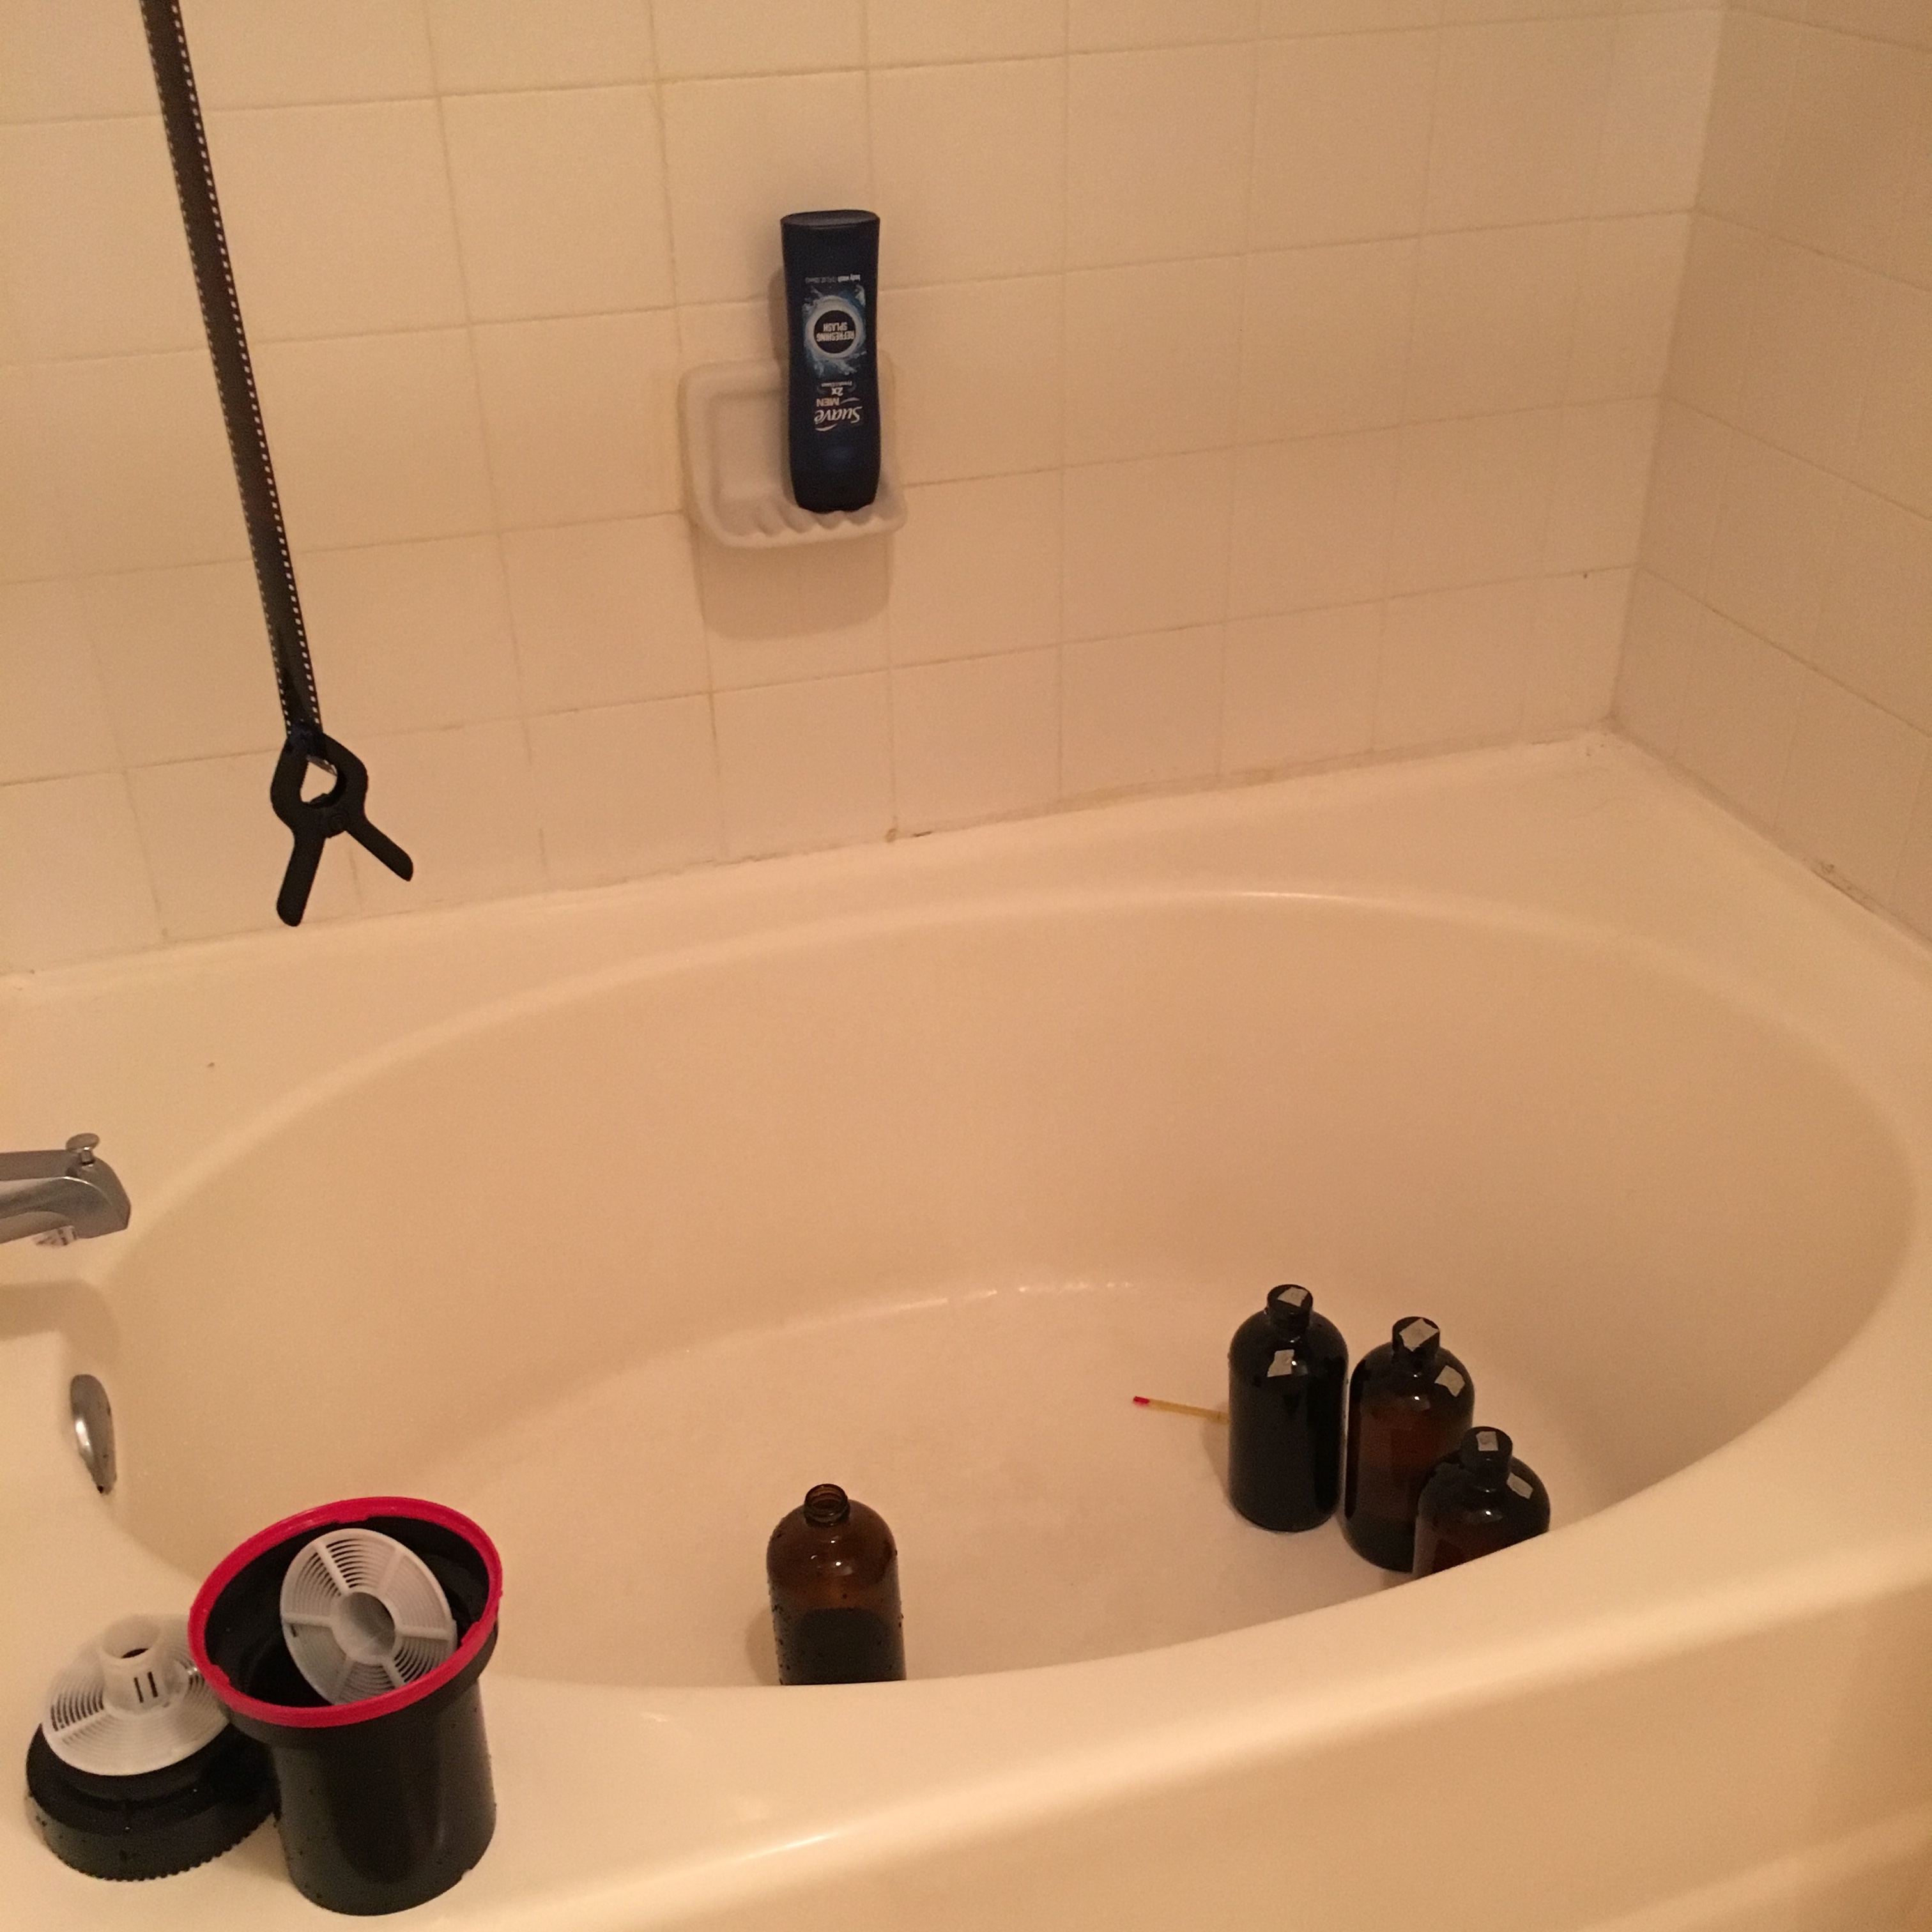 My home developing bathtub setup
After the film had dried I was only half way to being able to see how the images turned out. When you send your film off to a lab to be developed they will scan and process (invert and color correct at least) the negatives, and labs have fancy scanners that make this process pretty trivial. I only have the flatbed scanner on top of my printer and a digital camera. The scanner was designed to scan reflective media like paper, and does a pretty poor job of scanning transparent media like film. There are ways to modify the scanner such that you can scan film on it, but after a few attempts I decided this wasn’t the way to go. A digital camera, however, is actually a pretty good tool for scanning film. I’m using scanning here in a loose sense, as what I really did was take pictures of the negatives. To take a good picture of the negatives I set up a cardboard box with a slightly larger than one 35mm frame sized hole on the top. Under this box I put a flash I had set up on a remote trigger. You need backlighting here to get all the details of the negative, and a diffused flash works well because it gives you a pretty even light that is easy to dial in. I used an old Canon Fd 100mm f/4 macro lens with an extension tube so I could fill the entire frame with the negative, and macro lenses have the benefit of a flatter field of focus which helps here.
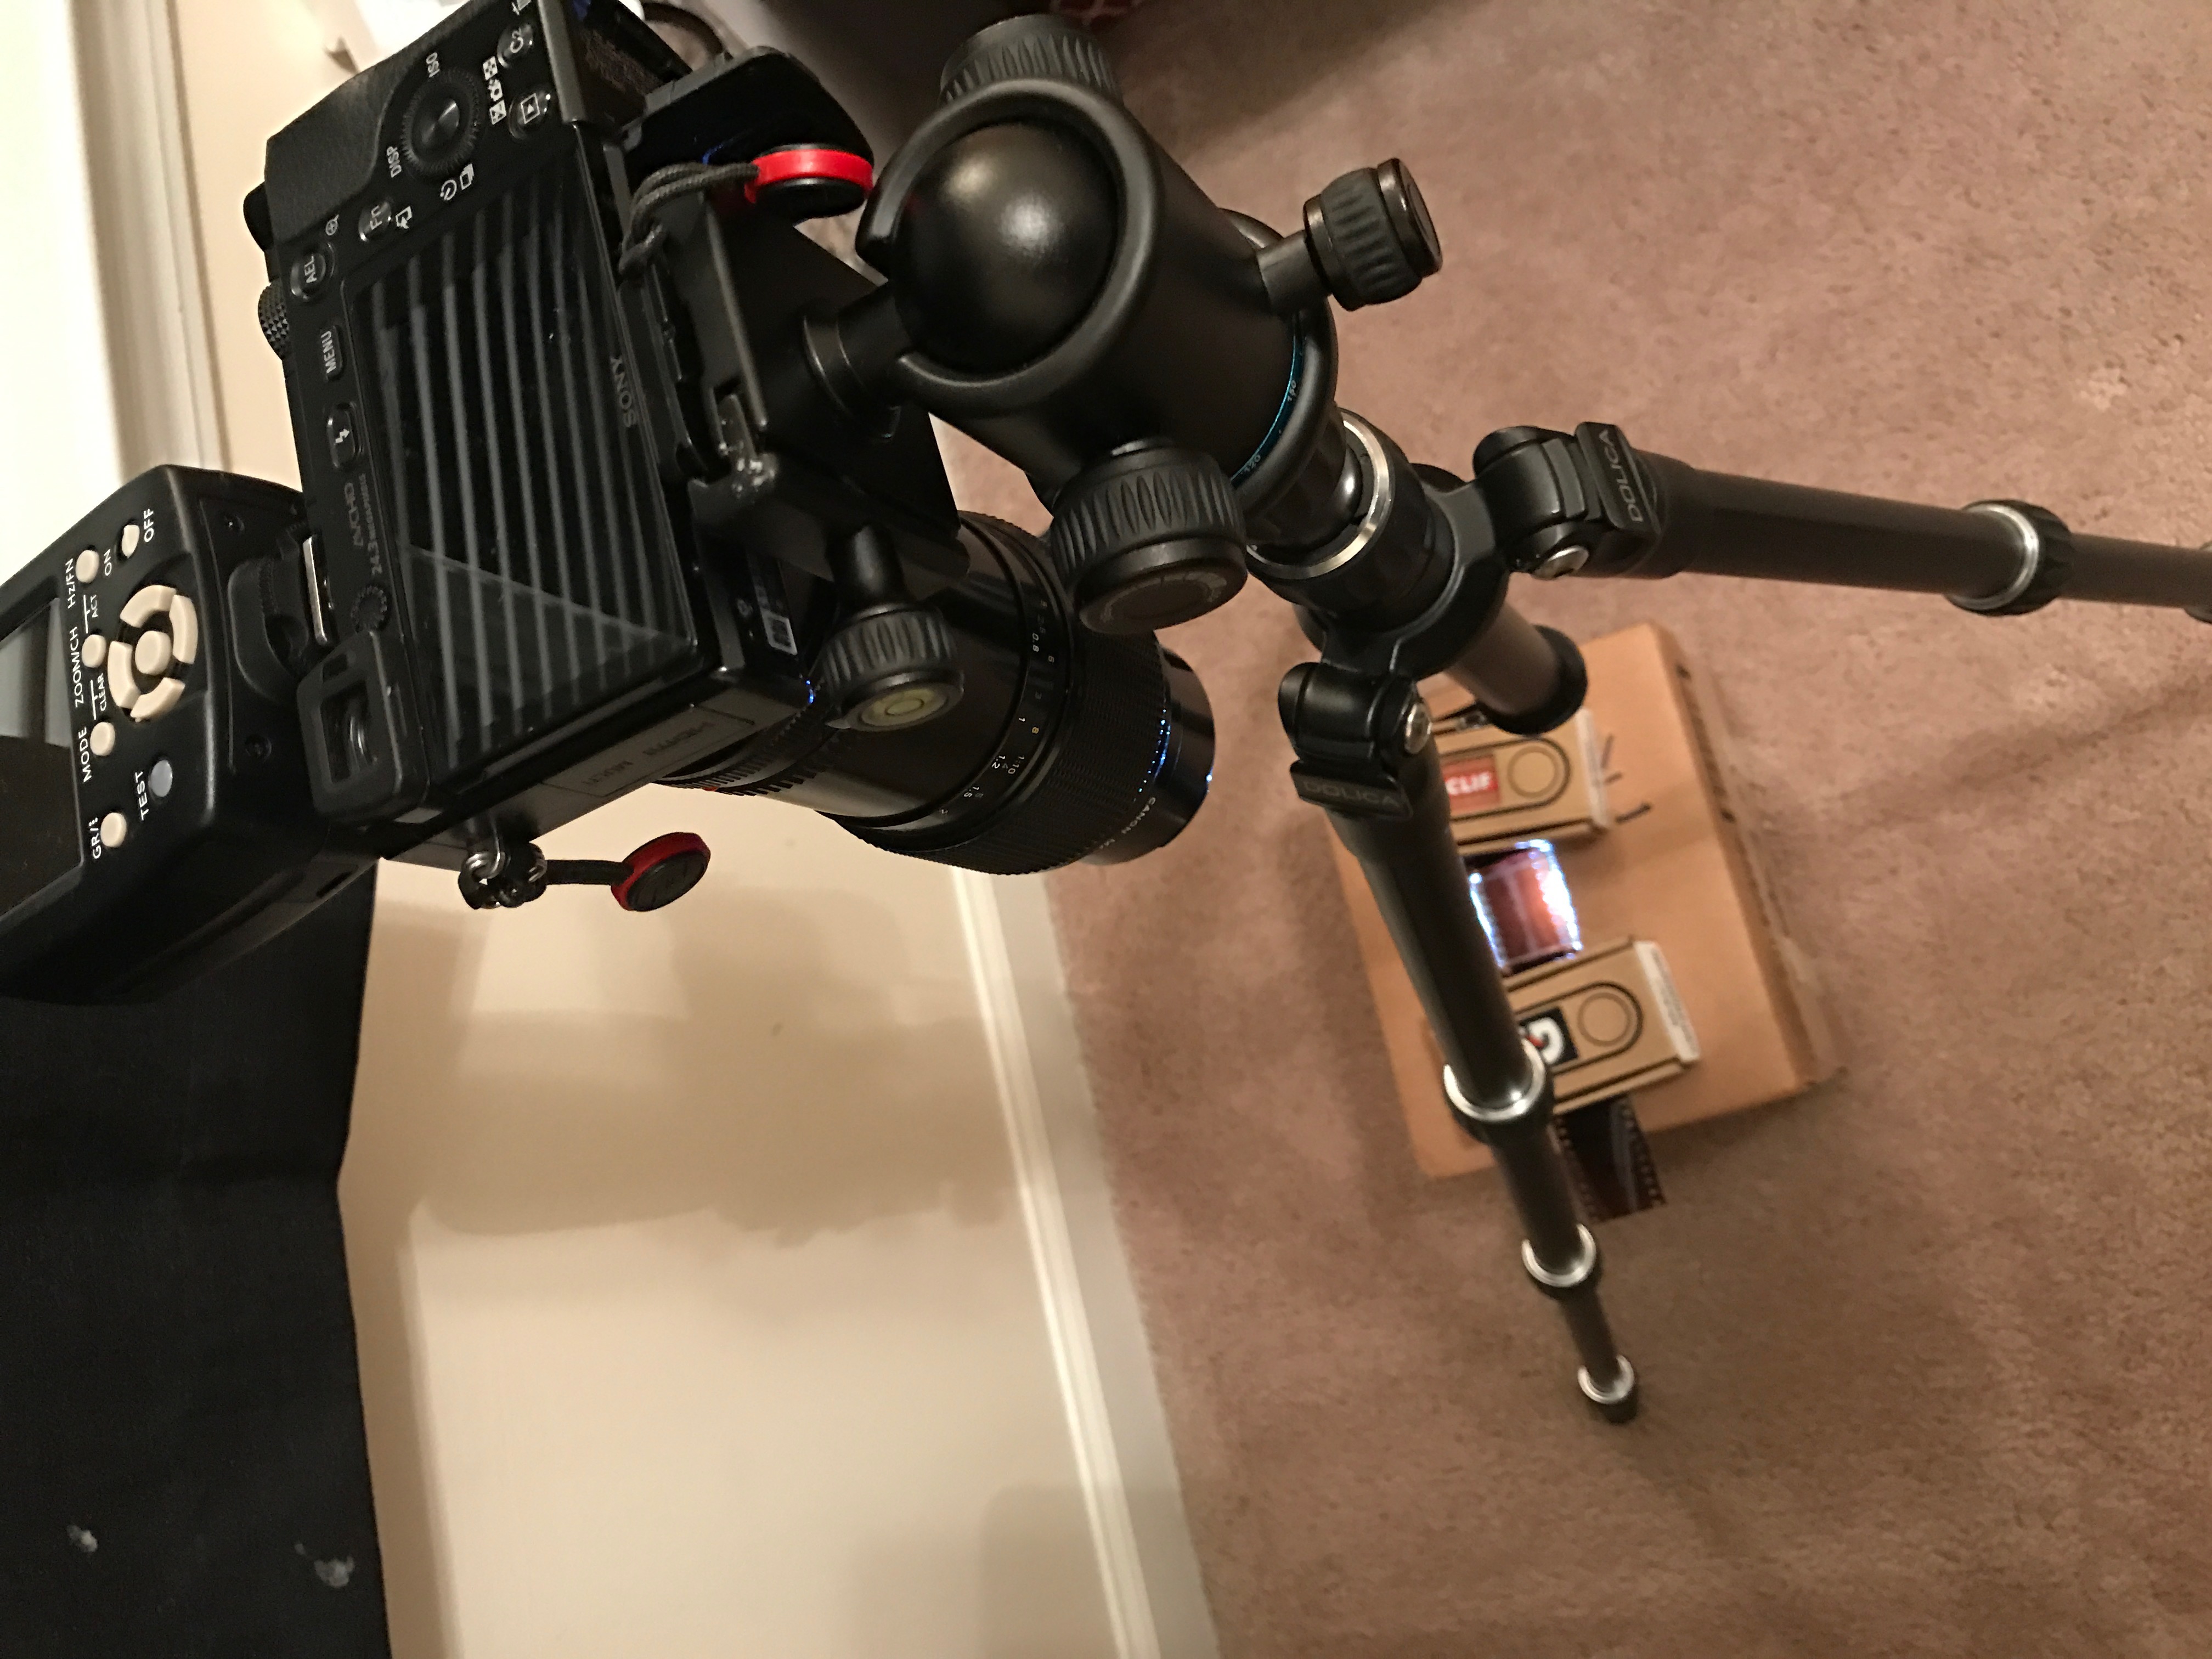 My film scanning setup
Once the images are imported into Lightroom on my computer after scanning them with my camera there’s still a fair amount to be done. I first crop the image so just the original 35mm frame remains, and after that I move to Photoshop to invert and color correct. Color negatives have a strong orange cast due to the nature of the various emulsions of color film, and that cast needs to be corrected. There’s a really effective set of Photoshop actions I found that make this process pretty easy. Once color is corrected I clone out most of the imperfections from scanning, like dust spots or fibers on the film, and move it back into Lightroom. At this point the workflow is the same as any other image.
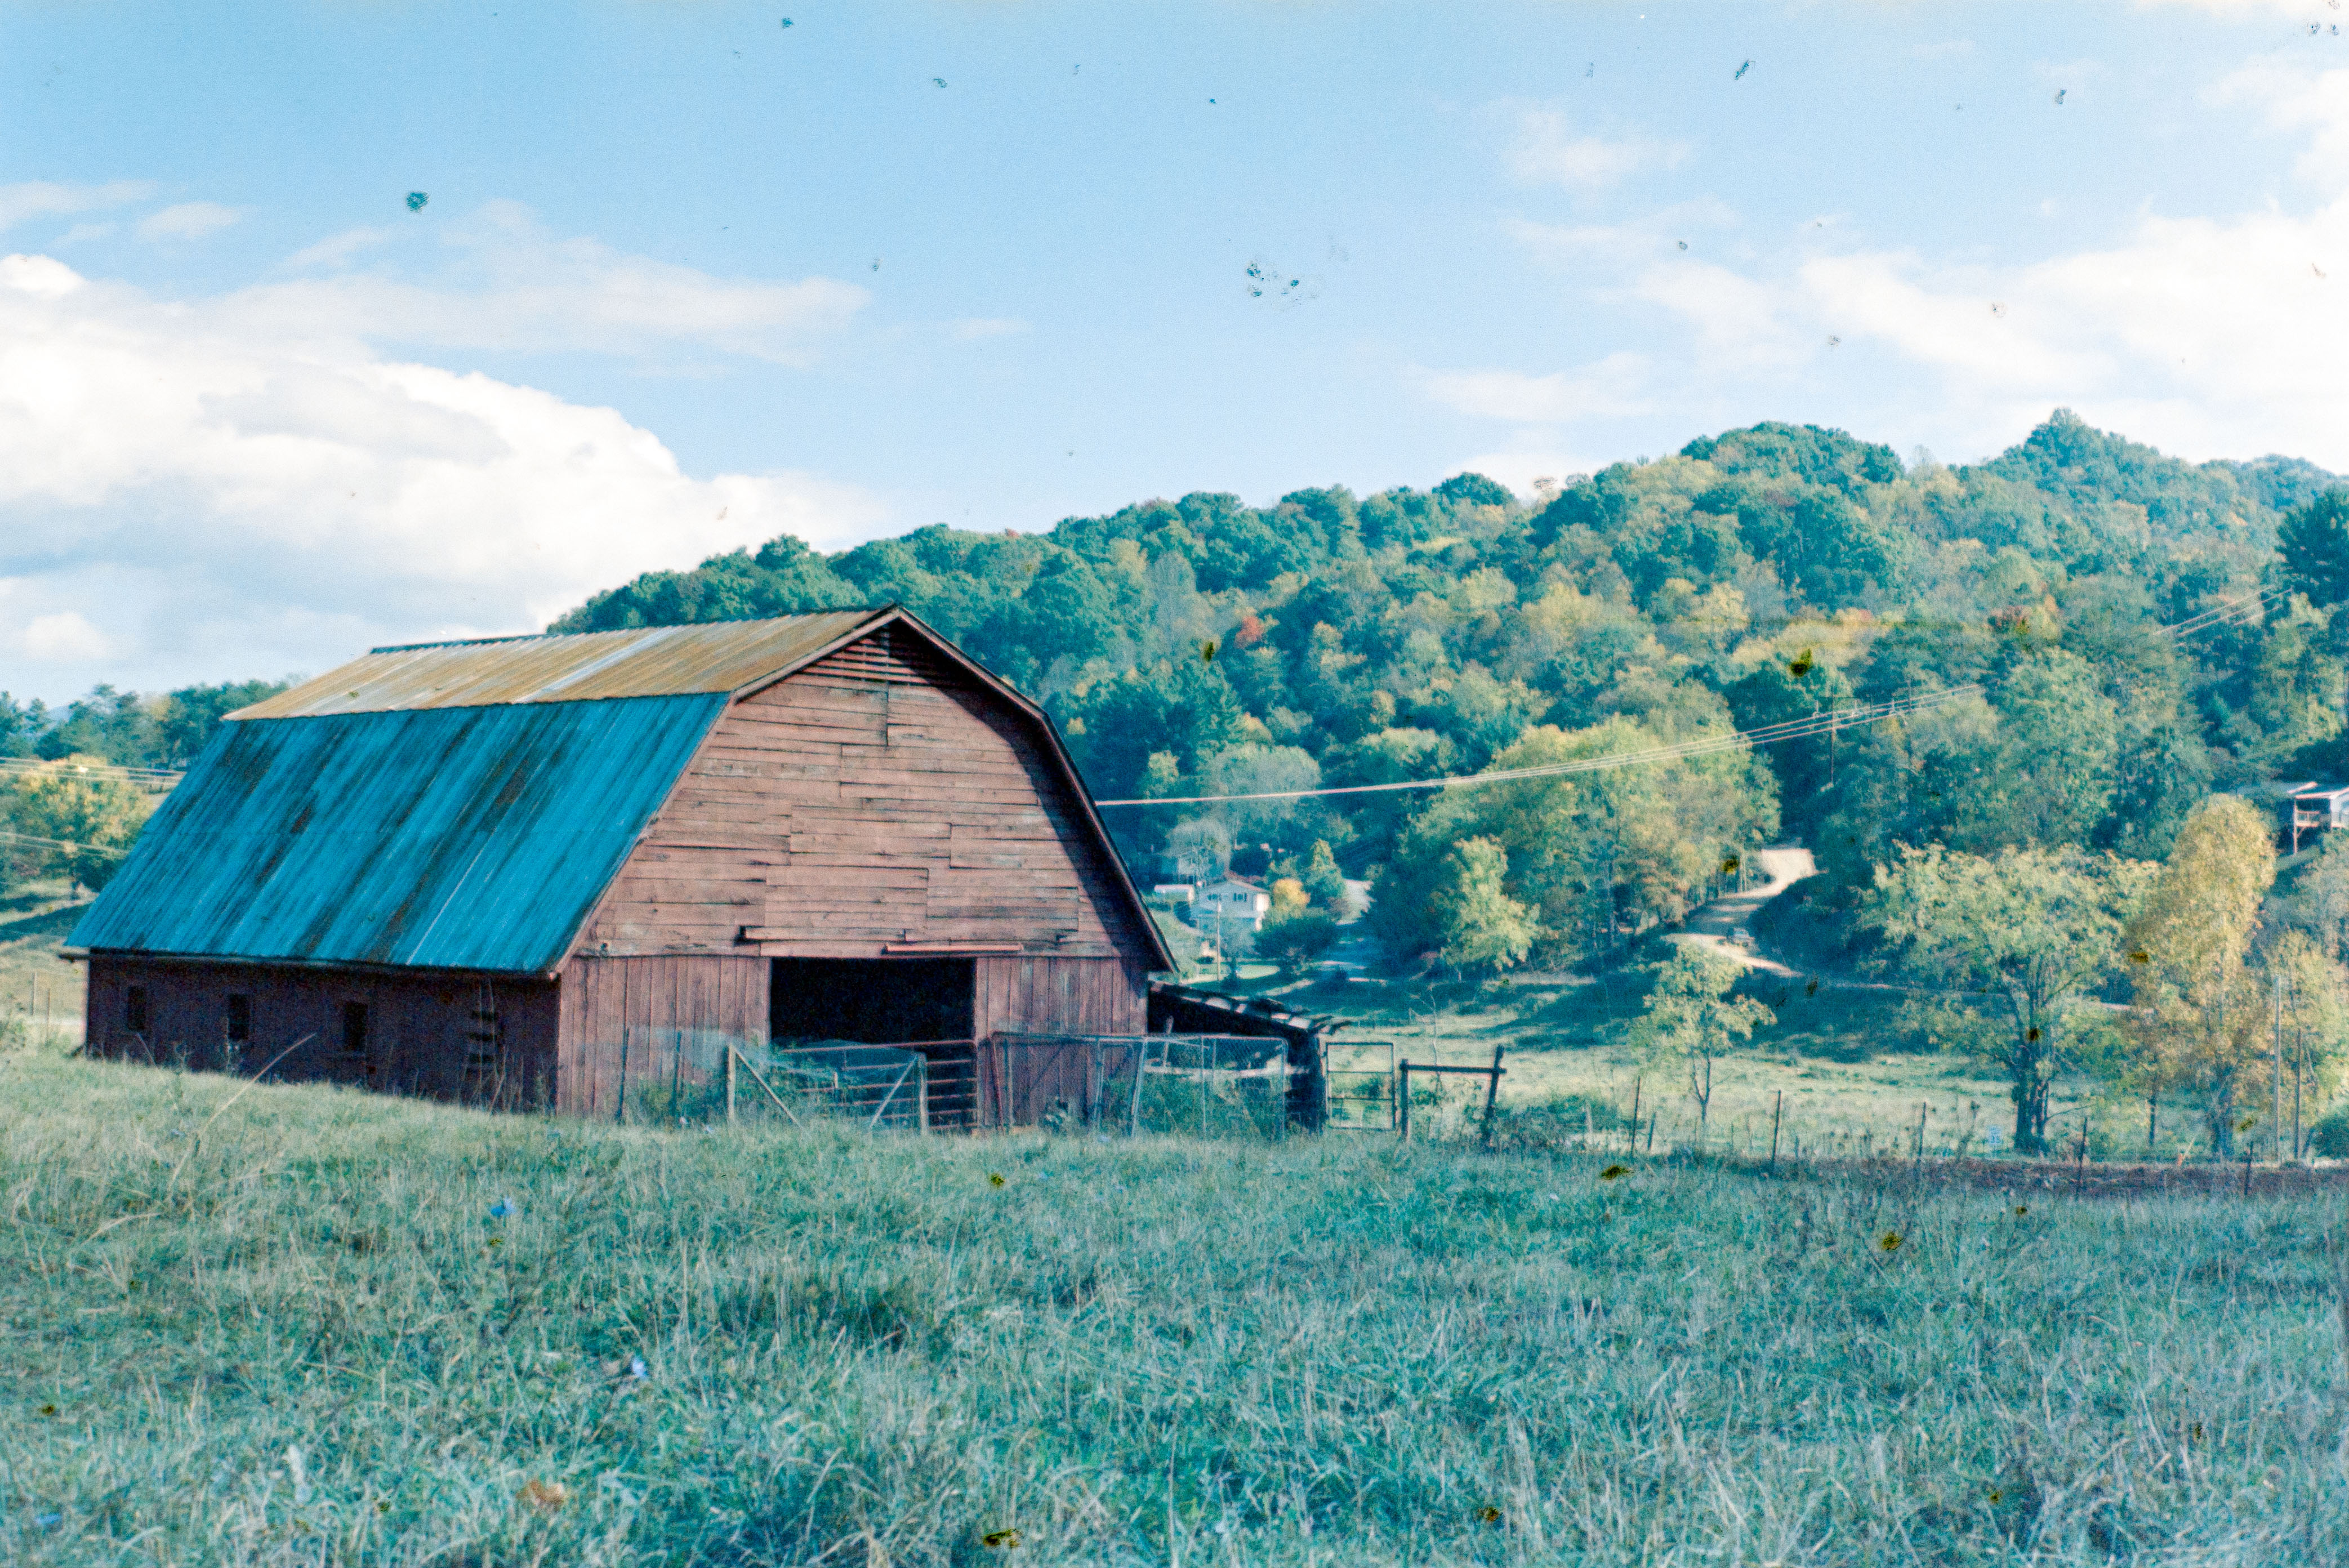
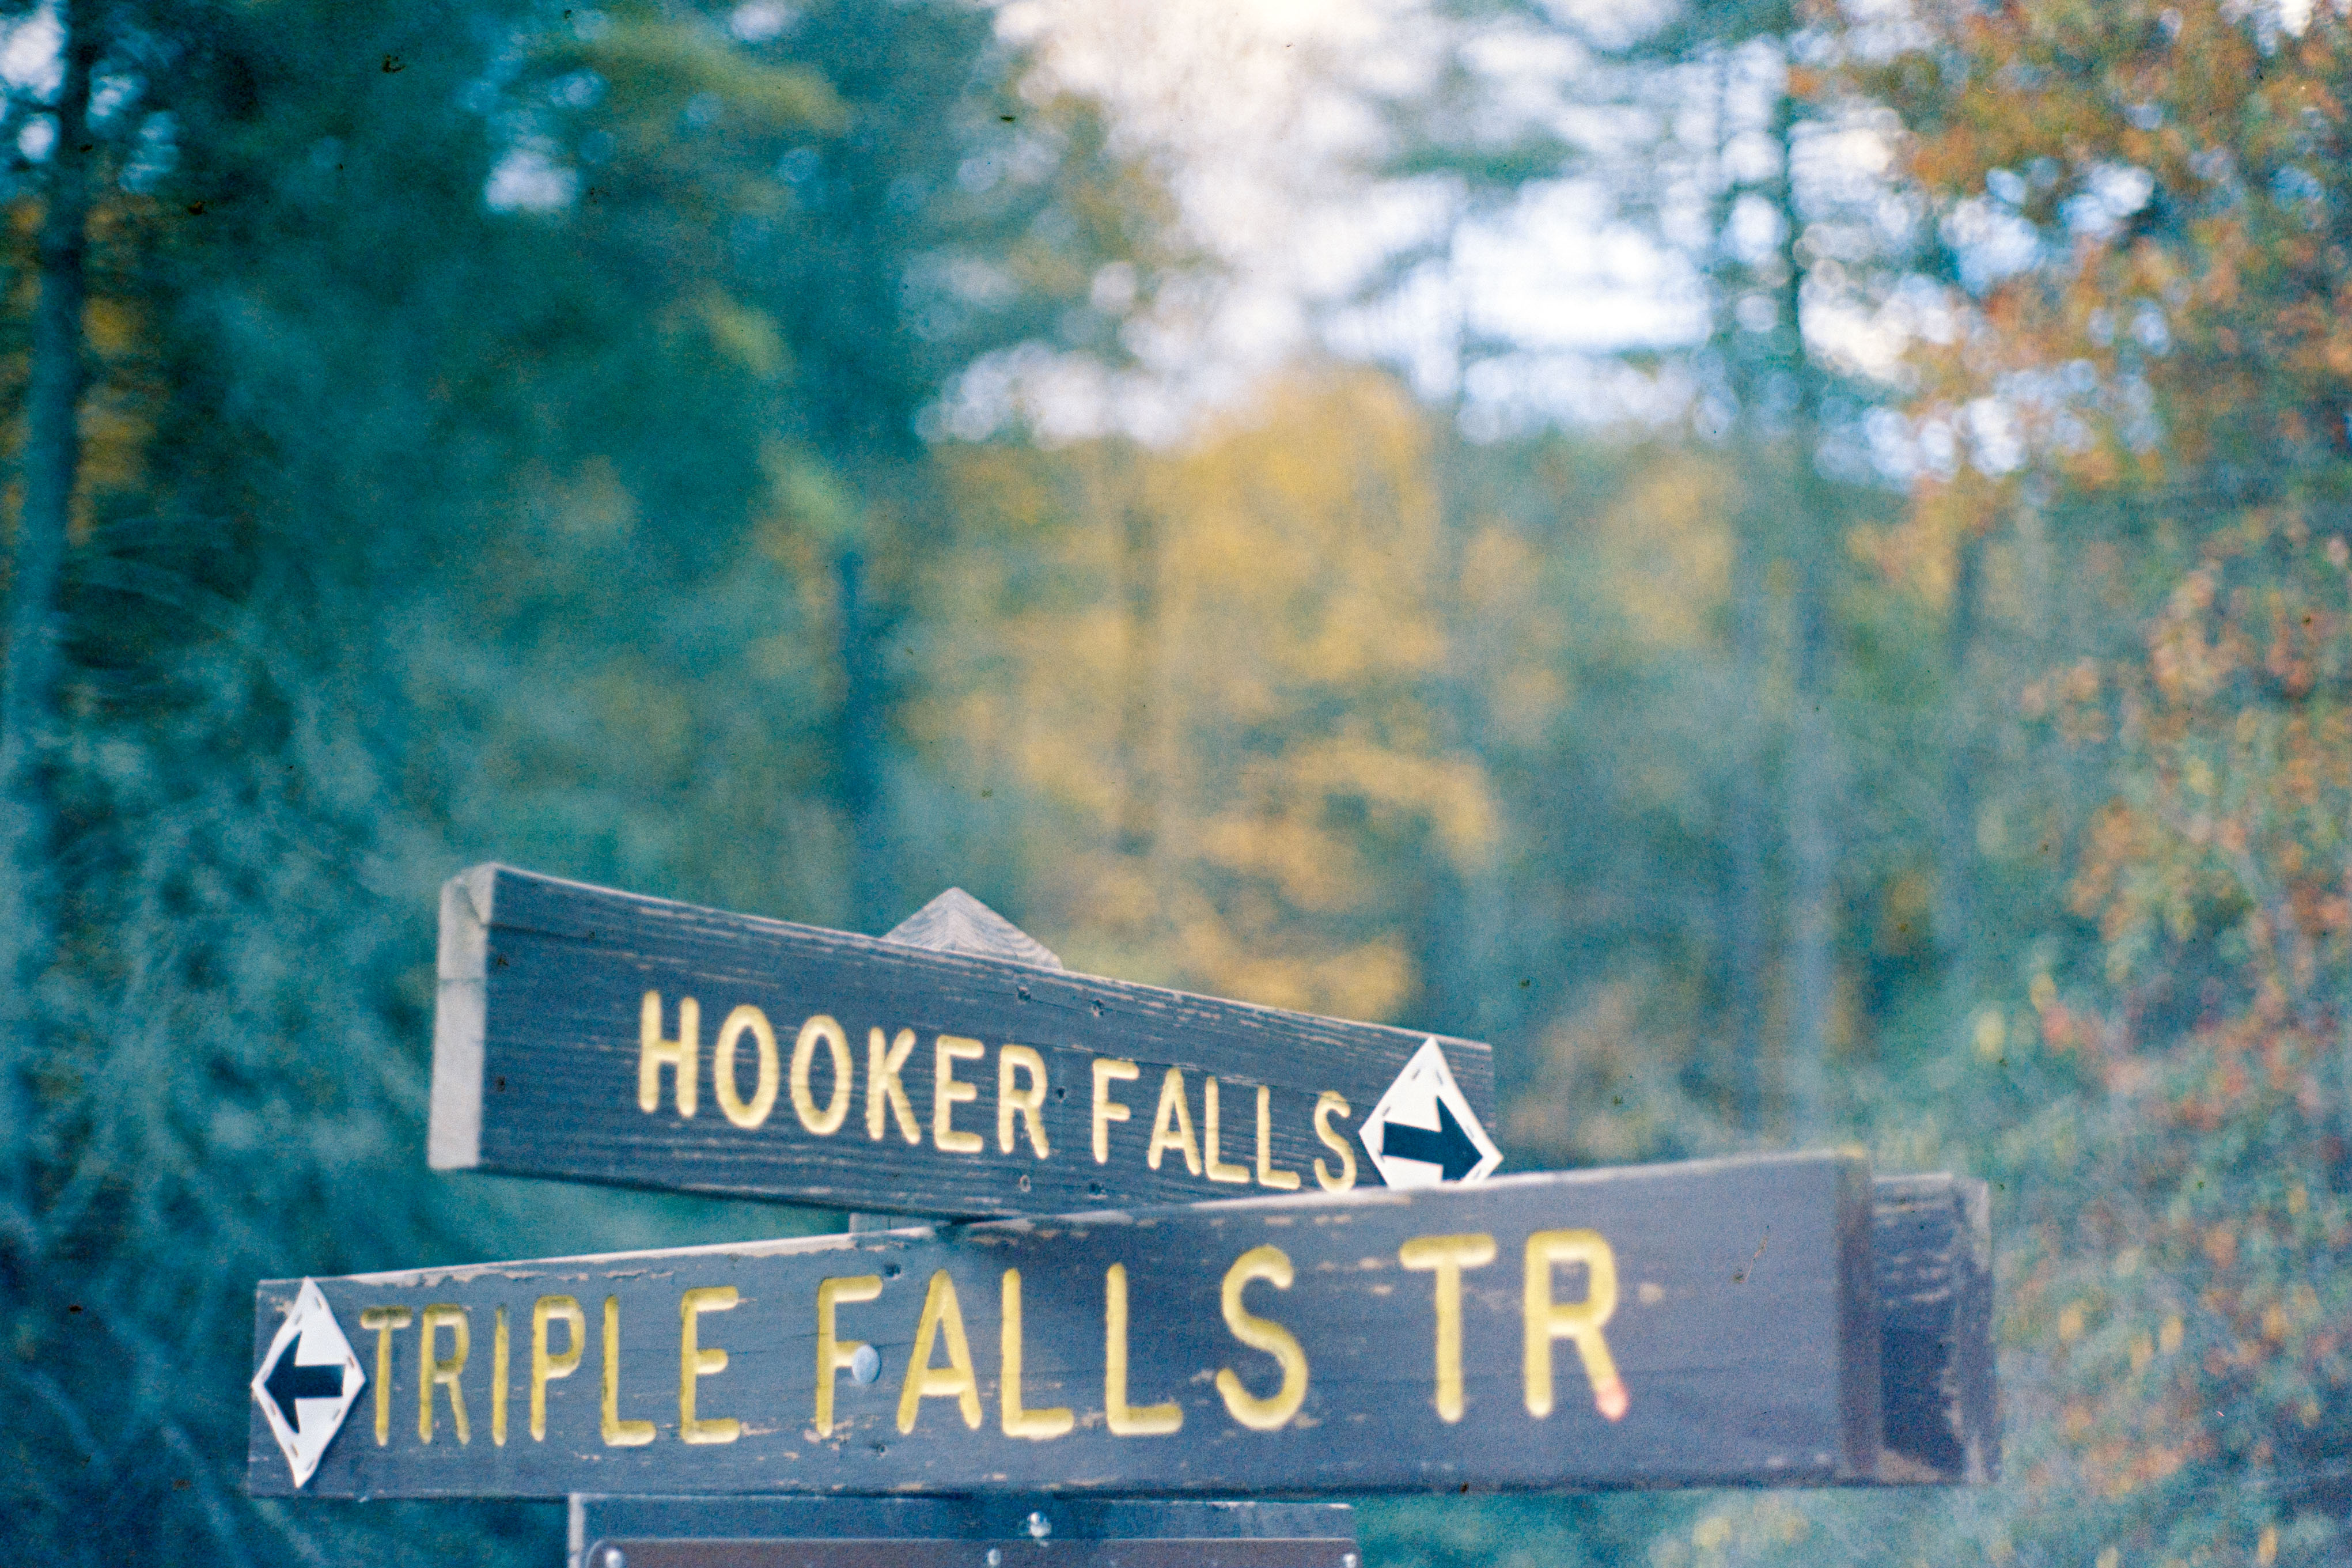
This process is significantly more complicated than removing the SD card and importing photos into Lightroom, but that’s part of the whole appeal of shooting film. It’s a stark contrast to shooting digital where you can see the results immediately. Not only do you have to wait until you’ve finished a roll of twenty-four or thirty-six exposures, but you also have to get the film developed, scanned, and edited until you can see what you’ve done. You anticipate the results a lot more this way, but you also can’t correct an obvious issue with focus or metering. Each shot costs not only dollars but time, and that added cost is considered when taking the pictures to begin with. It’s a fulfilling process though, and one I think I will continue.